DIY Lip Balms and Natural Beauty Products
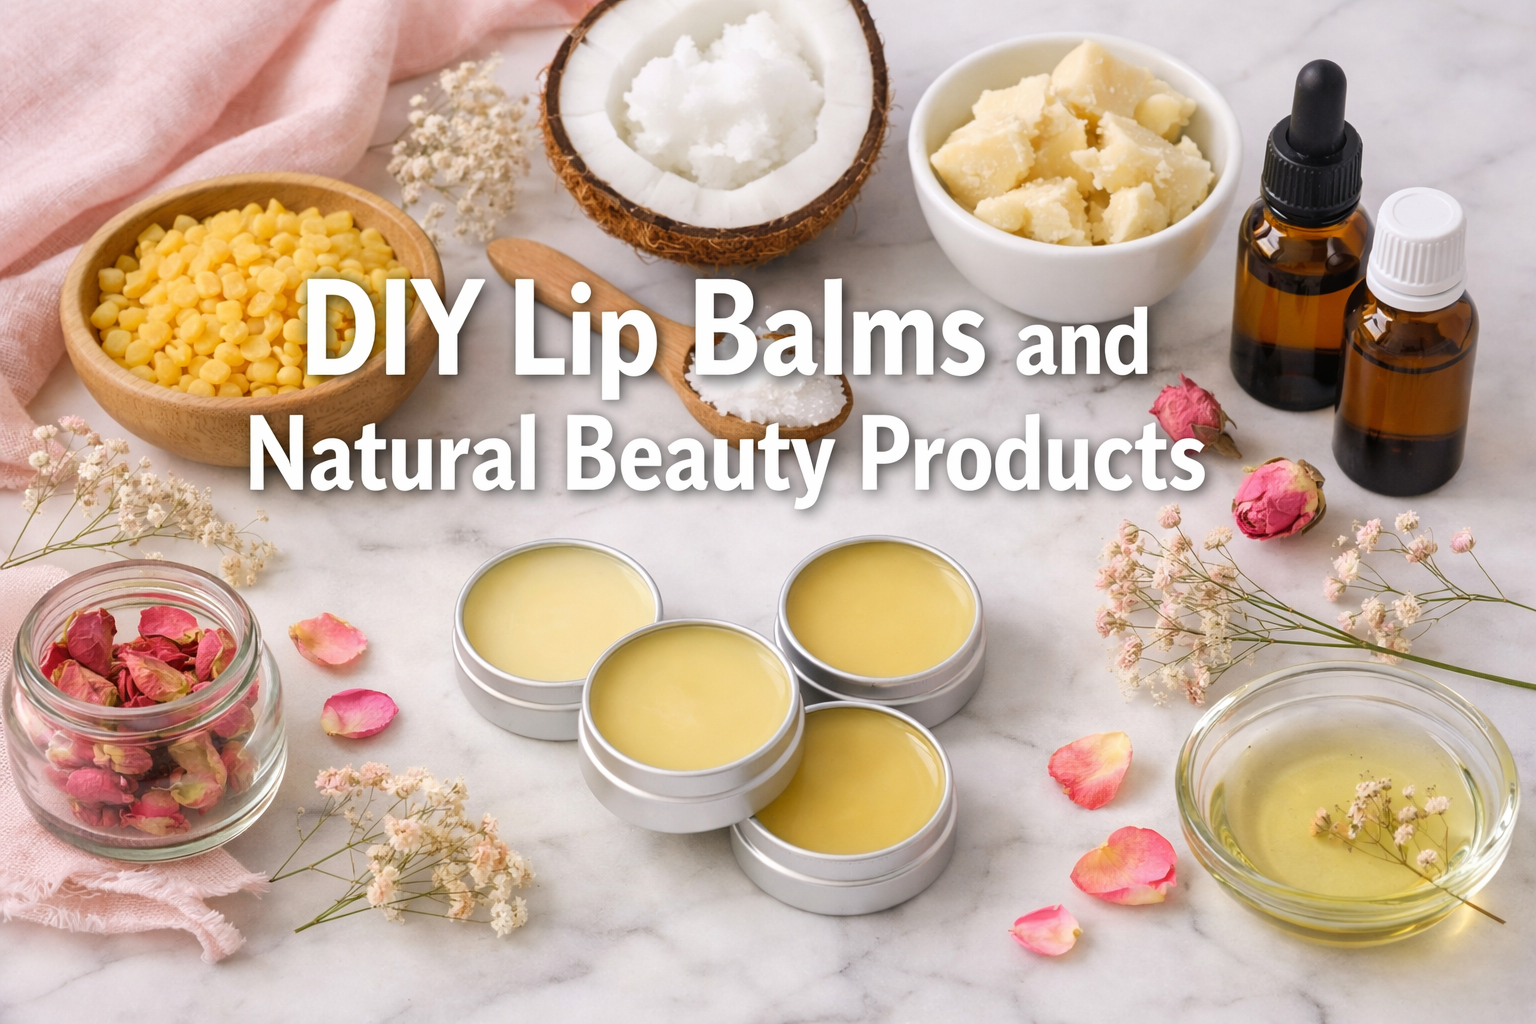
Picture this: you reach for your favorite lip balm, only to discover a list of ingredients you can’t pronounce. What if there was a better way? DIY Lip Balms and Natural Beauty Products offer an exciting alternative that puts you in control of what goes on your skin. In 2026, more people than ever are discovering the joy of creating their own beauty essentials using simple, natural ingredients from their kitchen pantry.
The beauty industry is experiencing a remarkable shift toward transparency and sustainability. Women across the globe are trading complicated chemical formulas for wholesome ingredients like coconut oil, beeswax, and essential oils. This movement isn’t just about avoiding harsh chemicals—it’s about embracing creativity, saving money, and knowing exactly what nourishes your skin.
Key Takeaways
• Simple ingredients work wonders: Basic items like beeswax, coconut oil, and shea butter can create professional-quality lip balms and skincare products
• Cost-effective beauty routine: Making your own products costs significantly less than buying commercial alternatives while delivering superior results
• Complete control over ingredients: Avoid harsh chemicals, allergens, and synthetic fragrances by choosing every component yourself
• Customizable formulas: Tailor scents, textures, and benefits to match your specific skin needs and preferences
• Sustainable and eco-friendly: Reduce packaging waste and environmental impact while supporting ethical ingredient sourcing
Getting Started with DIY Lip Balms and Natural Beauty Products
Creating your own beauty products might seem intimidating at first, but it’s surprisingly simple once you understand the basics. The foundation of most DIY Lip Balms and Natural Beauty Products relies on just a few key ingredients that work together to moisturize, protect, and heal your skin.
Essential Base Ingredients 🌿
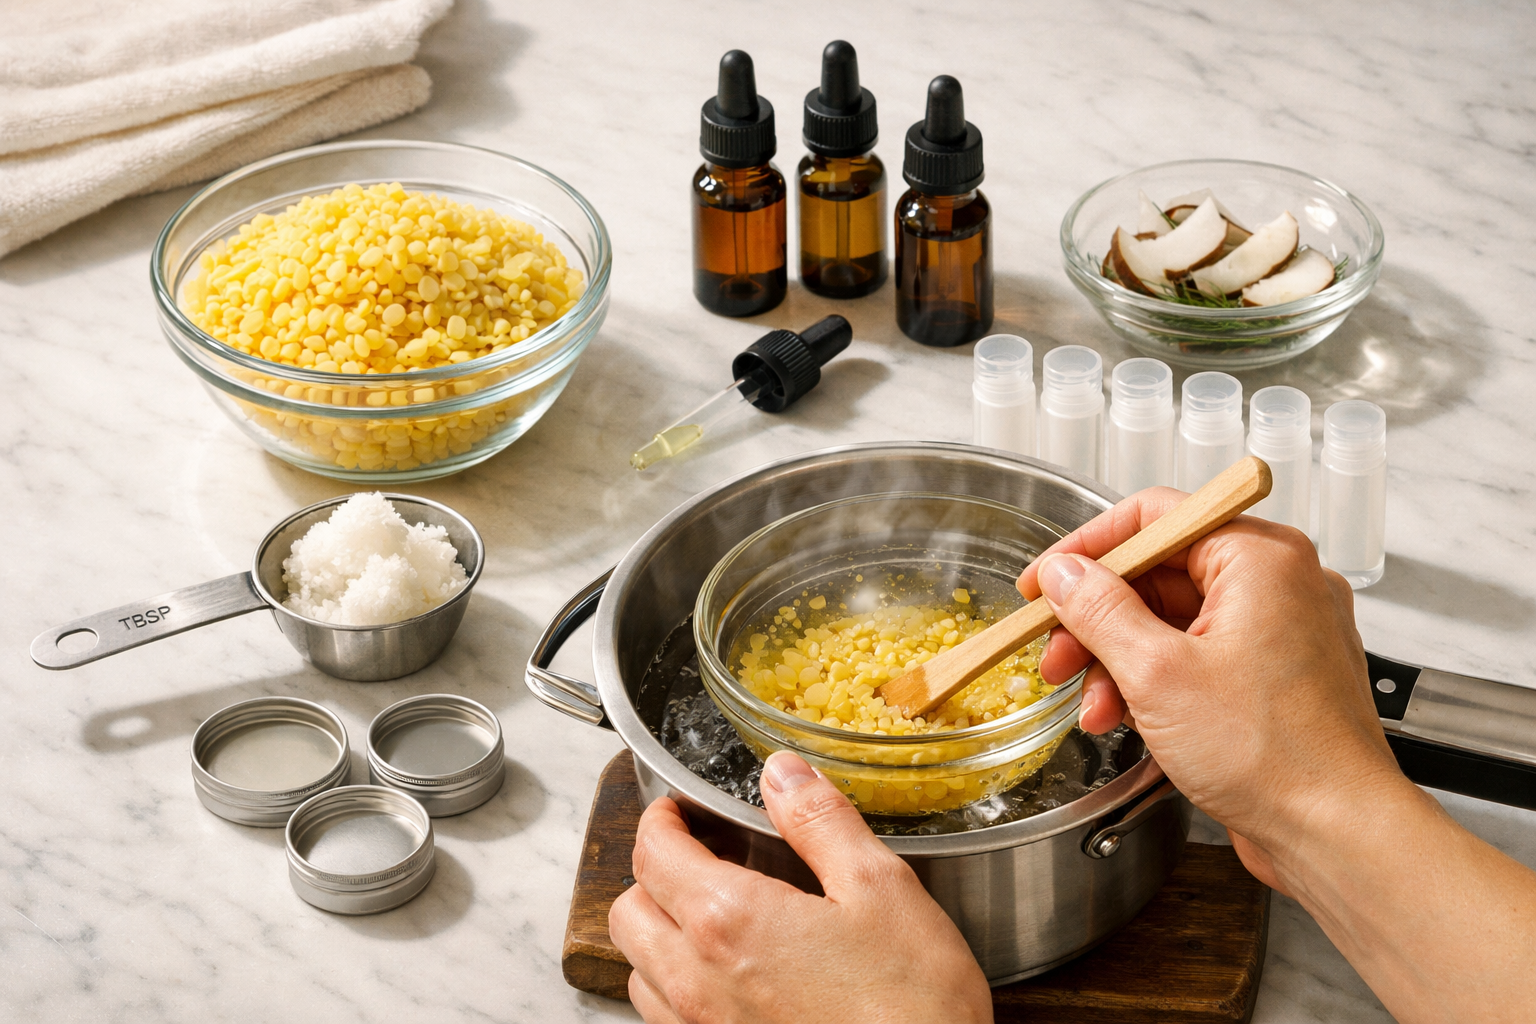
Beeswax serves as the primary hardening agent in lip balms and solid beauty products. This natural wax creates the perfect consistency while providing protective properties. Look for organic, unbleached beeswax pellets for easiest melting.
Carrier oils form the moisturizing base of your products. Popular choices include:
- Coconut oil: Antimicrobial properties with a light, pleasant scent
- Sweet almond oil: Gentle and suitable for sensitive skin
- Jojoba oil: Technically a wax that closely mimics skin’s natural sebum
- Olive oil: Rich in vitamins and readily available
Shea butter adds luxurious texture and deep moisturizing benefits. This African tree nut butter contains natural vitamins A and E, making it perfect for healing dry, cracked lips.
Basic Equipment You’ll Need
Creating DIY Lip Balms and Natural Beauty Products requires minimal equipment, most of which you probably already own:
| Equipment | Purpose | Alternative |
|---|---|---|
| Double boiler | Gentle melting of ingredients | Glass bowl over saucepan |
| Small containers | Storing finished products | Clean mint tins, small jars |
| Measuring spoons | Precise ingredient ratios | Regular kitchen spoons |
| Wooden stirring sticks | Mixing ingredients | Clean popsicle sticks |
| Dropper bottles | Essential oil measurement | Toothpicks for small amounts |
Pro Tip: Start with small batches when learning. A basic lip balm recipe typically yields 6-8 tubes, perfect for testing and gifting!
Simple DIY Lip Balm Recipes for Beginners
The beauty of DIY Lip Balms and Natural Beauty Products lies in their simplicity. These beginner-friendly recipes require just three to four ingredients and take less than 30 minutes from start to finish.
Classic Vanilla Honey Lip Balm
This foolproof recipe creates a smooth, nourishing lip balm with a subtle sweet scent that appeals to everyone.
Ingredients:
- 2 tablespoons coconut oil
- 1 tablespoon beeswax pellets
- 1 tablespoon shea butter
- 1 teaspoon honey
- 10 drops vanilla essential oil
Instructions:
- Melt the base: Combine coconut oil, beeswax, and shea butter in your double boiler
- Heat gently: Stir occasionally until completely melted and combined
- Add honey: Remove from heat and whisk in honey until smooth
- Scent it: Add vanilla essential oil and stir thoroughly
- Pour quickly: Fill lip balm tubes or small containers immediately
- Cool completely: Allow to set for 2 hours before use
Refreshing Peppermint Lip Balm
Perfect for those who love a cooling sensation, this recipe provides natural lip plumping and refreshing benefits.
Ingredients:
- 3 tablespoons sweet almond oil
- 1.5 tablespoons beeswax pellets
- 1 tablespoon cocoa butter
- 15 drops peppermint essential oil
- 5 drops vitamin E oil
Special Benefits:
- Peppermint oil stimulates circulation for naturally fuller-looking lips
- Cocoa butter provides rich moisture and a subtle chocolate scent
- Vitamin E acts as a natural preservative and antioxidant
Healing Calendula Lip Balm
This therapeutic recipe soothes chapped, damaged lips with gentle healing ingredients.
Ingredients:
- 2 tablespoons calendula-infused olive oil*
- 1 tablespoon beeswax pellets
- 1 tablespoon mango butter
- 8 drops lavender essential oil
*To make calendula-infused oil: Steep dried calendula petals in olive oil for 2 weeks, then strain.
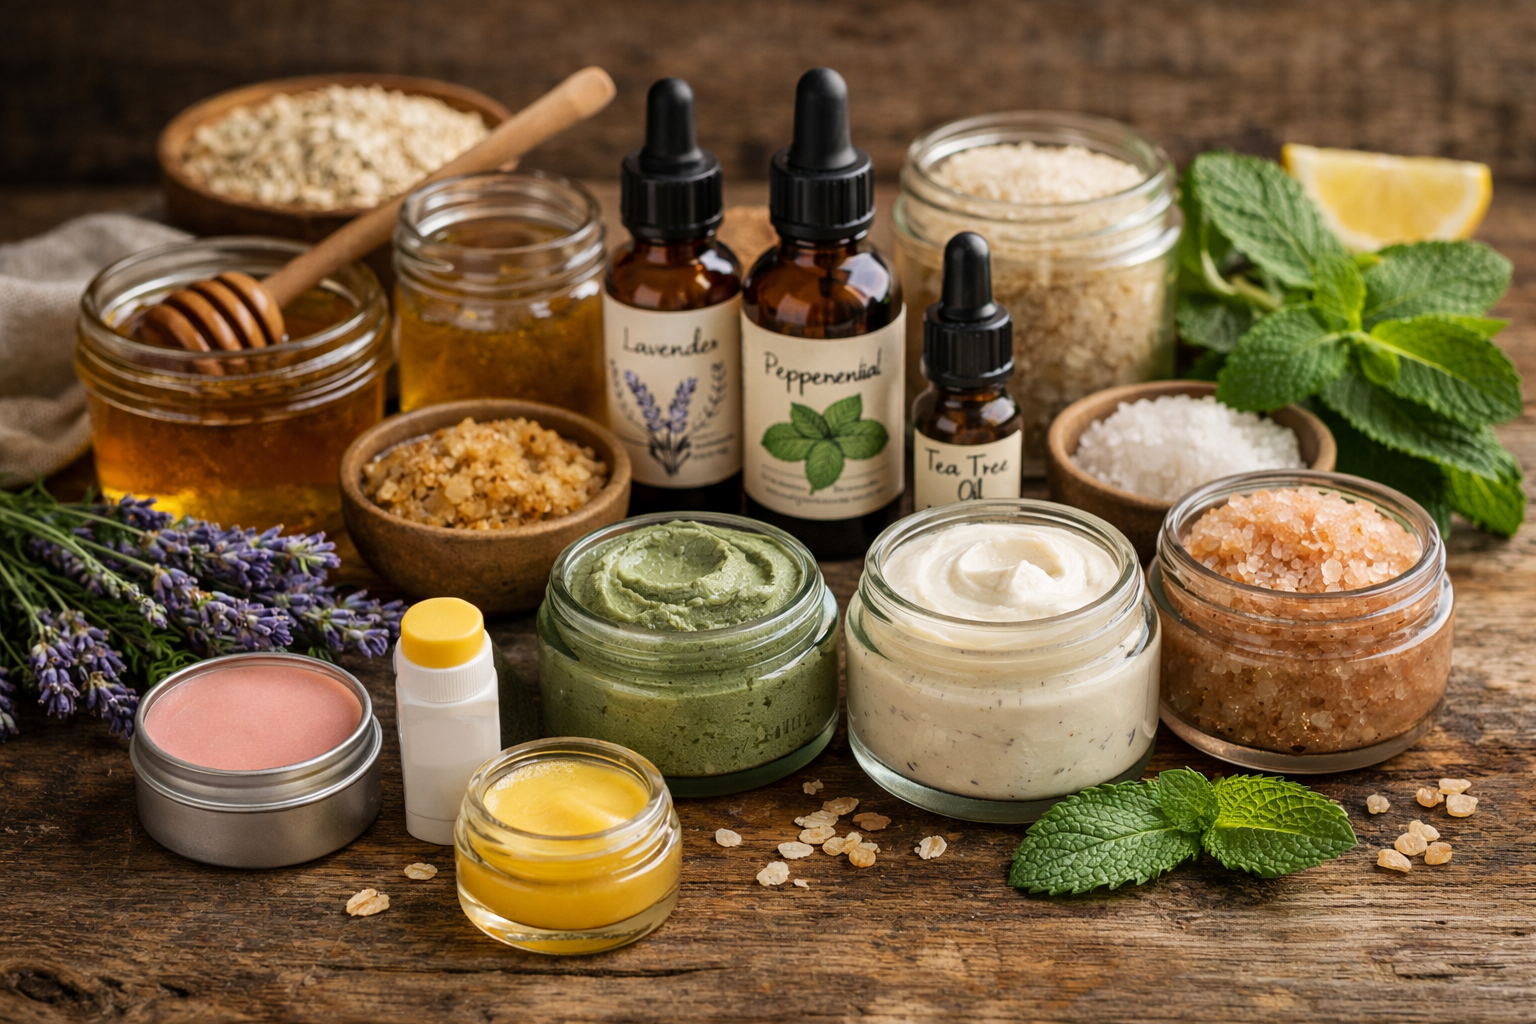
Expanding Your Natural Beauty Product Collection
Once you’ve mastered basic lip balms, the world of DIY Lip Balms and Natural Beauty Products opens up to include face masks, body scrubs, moisturizers, and more. These products follow similar principles while targeting different skincare needs.
Nourishing Face Masks 🧴
Oatmeal Honey Face Mask works wonders for sensitive or irritated skin:
- 1/4 cup ground oats
- 2 tablespoons raw honey
- 1 tablespoon plain yogurt
- 5 drops chamomile essential oil
Mix ingredients into a paste, apply to clean skin for 15 minutes, then rinse with warm water. The oats gently exfoliate while honey and yogurt provide moisture and probiotics.
Green Tea Clay Mask detoxifies and purifies oily or acne-prone skin:
- 2 tablespoons bentonite clay
- 1 tablespoon matcha powder
- Enough green tea (cooled) to form paste
- 3 drops tea tree oil
Luxurious Body Scrubs
Coffee Sugar Scrub energizes skin while removing dead cells:
- 1/2 cup used coffee grounds
- 1/2 cup brown sugar
- 1/4 cup coconut oil (melted)
- 10 drops orange essential oil
Lavender Salt Scrub provides relaxation and smooth skin:
- 1 cup sea salt
- 1/3 cup sweet almond oil
- 15 drops lavender essential oil
- 1 tablespoon dried lavender buds
Natural Moisturizers and Serums
Creating facial moisturizers requires understanding different skin types and their needs. DIY Lip Balms and Natural Beauty Products for face care often use lighter oils and specific active ingredients.
Lightweight Face Serum for Oily Skin:
- 2 tablespoons jojoba oil
- 1 tablespoon rosehip seed oil
- 5 drops frankincense essential oil
- 3 drops geranium essential oil
Rich Night Moisturizer for Dry Skin:
- 1/4 cup shea butter
- 2 tablespoons argan oil
- 1 tablespoon rosehip oil
- 8 drops rose essential oil
- 5 drops vitamin E oil
Safety Tips and Best Practices
Working with DIY Lip Balms and Natural Beauty Products requires attention to safety and hygiene to ensure your creations are both effective and safe for use.
Ingredient Safety Guidelines ⚠️
Essential Oil Precautions:
- Always dilute essential oils properly (typically 1-3% for skincare products)
- Research potential allergies and skin sensitivities
- Avoid photosensitive oils like citrus before sun exposure
- Pregnant women should avoid certain oils like rosemary and sage
Patch Testing Protocol:
Before using any new product, apply a small amount to your inner wrist or behind your ear. Wait 24 hours to check for reactions. This simple step prevents widespread irritation from unknown allergies.
Proper Storage and Shelf Life
Storage Best Practices:
- Use dark glass containers to protect from light degradation
- Store in cool, dry places away from direct sunlight
- Label everything with ingredients and date made
- Keep water-based products refrigerated
Shelf Life Guidelines:
| Product Type | Shelf Life | Storage Method |
|---|---|---|
| Oil-based lip balms | 12-18 months | Cool, dry place |
| Water-based products | 1-2 weeks | Refrigerated |
| Scrubs with fresh ingredients | 1 week | Refrigerated |
| Pure oil blends | 6-12 months | Dark, cool location |
Hygiene and Sanitation
Clean Equipment Protocol:
- Wash all tools with hot, soapy water
- Rinse with rubbing alcohol
- Allow to air dry completely
- Use clean utensils for each batch
Important Note: Never introduce water into oil-based products without proper preservatives, as this creates an environment for harmful bacteria growth.
Troubleshooting Common Issues
Even experienced makers encounter challenges when creating DIY Lip Balms and Natural Beauty Products. Understanding common problems and their solutions helps ensure consistent, high-quality results.
Texture Problems and Solutions
Lip Balm Too Soft:
- Add more beeswax (start with 1/4 teaspoon additional)
- Ensure complete melting and mixing of ingredients
- Check if coconut oil ratio is too high
Lip Balm Too Hard:
- Reduce beeswax by small amounts
- Add more carrier oil
- Include softer butters like shea or mango
Grainy Texture:
- Usually caused by rapid cooling
- Reheat gently and cool slowly at room temperature
- Stir occasionally while cooling to prevent separation
Color and Scent Adjustments
Natural Colorants for Lip Products:
- Beetroot powder: Soft pink to red shades
- Cocoa powder: Brown tones
- Turmeric: Golden yellow (use sparingly)
- Spirulina: Green tints
Scent Intensity Issues:
- Start with fewer drops and add gradually
- Remember that scents may fade over time
- Some essential oils are naturally stronger than others
Advanced Techniques and Customization
As your skills develop, DIY Lip Balms and Natural Beauty Products can become increasingly sophisticated. Advanced techniques allow for professional-quality results and unique customizations.
Creating Signature Blends
Seasonal Lip Balm Collections:
- Spring: Rose and geranium with pink clay
- Summer: Coconut and lime with SPF-boosting zinc oxide
- Fall: Cinnamon and orange with warming spices
- Winter: Peppermint and eucalyptus for healing properties
Professional Finishing Touches
Custom Labels and Packaging:
Creating attractive packaging elevates your DIY Lip Balms and Natural Beauty Products from hobby to gift-worthy items:
- Design simple labels with ingredient lists
- Use kraft paper for rustic, natural appeal
- Include usage instructions and expiration dates
- Consider eco-friendly packaging options
Gift Set Ideas:
- Lip balm trio with complementary scents
- Complete skincare set with cleanser, toner, and moisturizer
- Seasonal collection themed around holidays
- Spa day package with scrubs, masks, and balms
Cost Analysis and Environmental Benefits
The financial and environmental advantages of DIY Lip Balms and Natural Beauty Products become clear when compared to commercial alternatives.
Financial Savings Breakdown
Cost Comparison Analysis:
| Product | Store-Bought Cost | DIY Cost | Savings |
|---|---|---|---|
| Premium lip balm | $8-15 each | $1-2 each | 75-85% |
| Face mask (single use) | $3-8 each | $0.50-1 each | 80-90% |
| Body scrub | $15-30 per jar | $3-5 per jar | 80-85% |
| Facial serum | $25-80 per bottle | $5-12 per bottle | 75-85% |
Initial Investment Recovery:
Most people recover their initial ingredient investment within 2-3 batches of products, after which the savings become substantial.
Environmental Impact
Packaging Reduction:
- Eliminate single-use plastic containers
- Reuse glass jars and metal tins indefinitely
- Reduce shipping emissions from commercial products
- Support local ingredient suppliers when possible
Ingredient Transparency:
Creating your own products ensures ethical sourcing and supports sustainable farming practices when you choose organic, fair-trade ingredients.
Building Your DIY Beauty Routine
Developing a comprehensive routine using DIY Lip Balms and Natural Beauty Products requires planning and gradual implementation.
Monthly Making Schedule
Week 1: Basic Lip Care
- Make 2-3 lip balm varieties
- Test different scent combinations
- Perfect your basic technique
Week 2: Face Care
- Create gentle cleanser
- Mix weekly face mask
- Develop daily moisturizer
Week 3: Body Care
- Prepare body scrub
- Make body butter
- Create massage oil blend
Week 4: Specialty Items
- Experiment with new ingredients
- Make gifts for friends
- Document successful recipes
Seasonal Ingredient Planning
Spring Ingredients:
- Fresh herbs like mint and lemon balm
- Light floral essential oils
- Gentle exfoliating ingredients
Summer Focus:
- Cooling ingredients like cucumber and aloe
- Sun protection elements
- Refreshing citrus scents
Fall Preparation:
- Healing ingredients for weather transition
- Warming spices and oils
- Rich, nourishing butters
Winter Essentials:
- Heavy moisturizing ingredients
- Healing oils for dry skin
- Comforting, warming scents
Conclusion
Creating DIY Lip Balms and Natural Beauty Products represents more than just a hobby—it’s a journey toward healthier skin, environmental consciousness, and creative self-expression. Throughout 2026, this movement continues growing as people discover the satisfaction of crafting personalized beauty solutions using simple, natural ingredients.
The benefits extend far beyond cost savings, though the financial advantages are substantial. When you make your own products, you gain complete control over ingredients, avoid harsh chemicals, and create formulations perfectly suited to your skin’s unique needs. The process itself becomes meditative and rewarding, offering a creative outlet that produces tangible, useful results.
Starting your DIY beauty journey doesn’t require extensive knowledge or expensive equipment. Begin with simple lip balm recipes using just three or four ingredients, then gradually expand your skills and product range. Remember that every expert started as a beginner, and each batch teaches valuable lessons about ingredient behavior and technique refinement.
Your Next Steps:
- Gather basic ingredients: Start with beeswax, coconut oil, and shea butter for your first lip balm batch
- Choose your first recipe: Pick one beginner-friendly formula and follow it exactly before experimenting
- Invest in proper storage: Purchase small containers and labels to keep your creations organized and safe
- Document your journey: Keep notes about what works, what doesn’t, and modifications you’d like to try
- Share your success: Gift homemade products to friends and family to spread the joy of natural beauty
The world of DIY Lip Balms and Natural Beauty Products offers endless possibilities for creativity, wellness, and sustainable living. As you develop your skills, you’ll discover that the most effective beauty solutions often come from the simplest, most natural ingredients. Start today, and begin experiencing the satisfaction of creating beautiful, nourishing products with your own hands.